
The coating web
Keep the coated web running consistently through the dryer and into the nip. Its behavior must be considered alongside the foil and PE layers.
Dry lamination of PET, thin aluminum foil and PE — balancing web tension, adhesive coverage and drying for coffee powder stand-up pouches.
Explore the process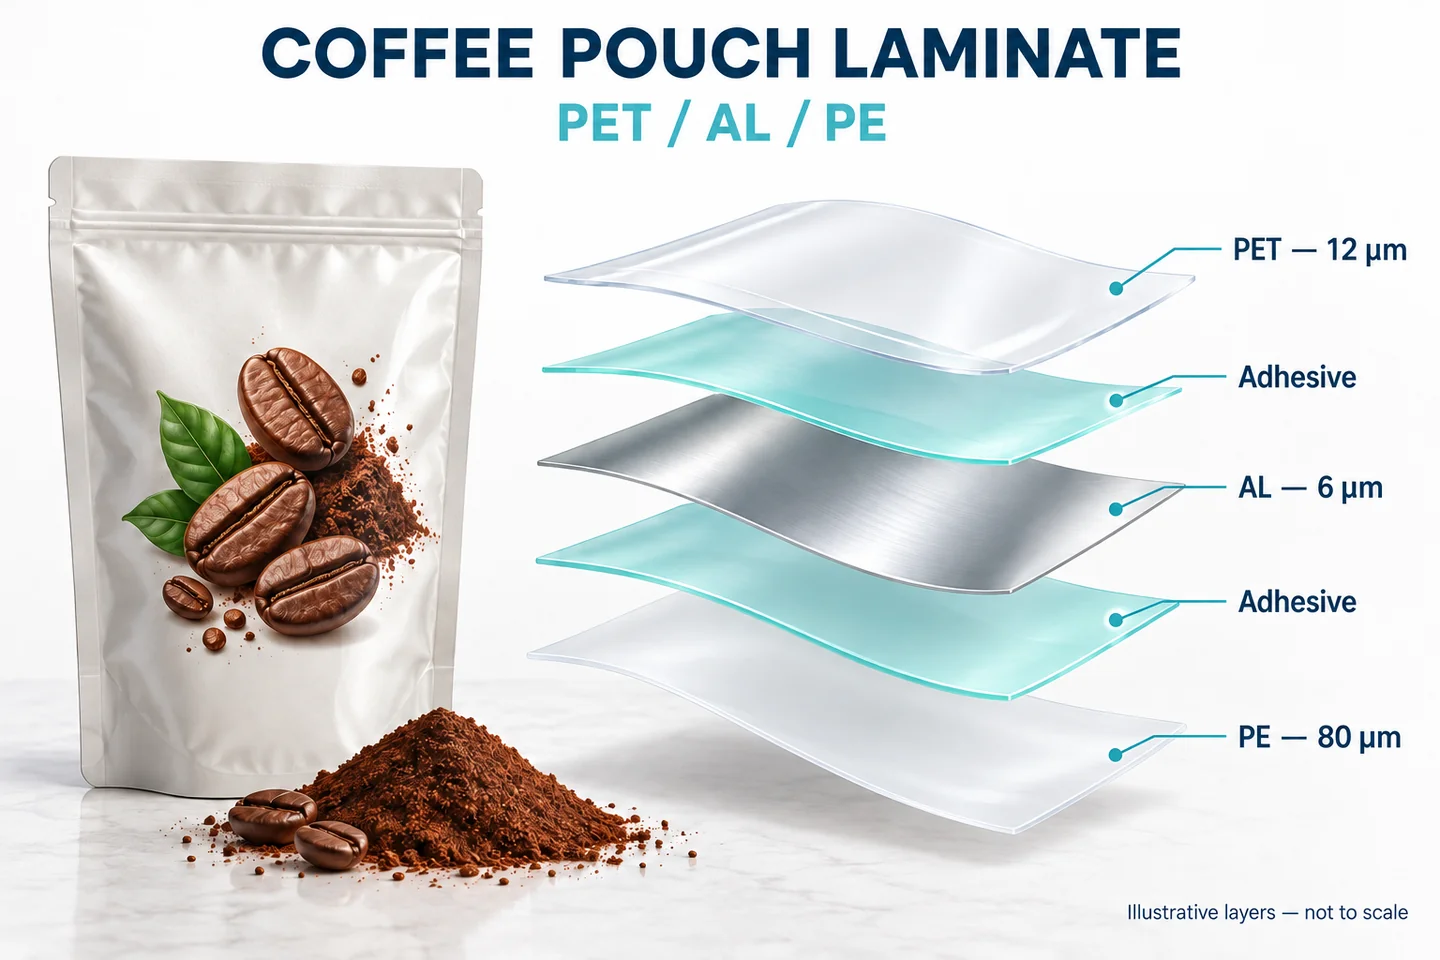
The HGF-300-P single-station high-speed dry laminator produces the three-layer structure through two separate lamination passes.
Adhesive is applied to the PET.
The 6 μm foil enters at the lamination nip; it does not travel through the first-pass dryer.
A second pass adds the PE sealing layer.
The second-pass coating side and the curing sequence between passes have not been specified in the supplied case notes.
| Pass | Base range | Adjusted range | Cylinder mesh reference |
|---|---|---|---|
| PET → AL | 3.0–3.5 g/m² | 3.5–4.0 g/m² Large printed areas on PET | 140–120 mesh |
| PET/AL → PE | 3.5–4.0 g/m² | 4.0–4.5 g/m² Powder or high-oil contents | 120–110 mesh |
These are supplied reference ranges, not confirmed measured coating weights for this run. Cylinder mesh alone does not establish coating weight; confirm cell volume, adhesive working solids and measured dry coat weight.
PET, aluminum foil and PE respond differently to tension and heat. A stable web path must be achieved without building excessive deformation into the laminate.
Keep the coated web running consistently through the dryer and into the nip. Its behavior must be considered alongside the foil and PE layers.
Thin foil has limited tolerance for stretching. Excessive unwind tension can deform the foil and contribute to wrinkles that become evident during later processing or curing.
Excessive tension can stretch the PE. Recovery after lamination creates a strain mismatch between layers, potentially contributing to curl or tunneling.
Review unwind, nip and rewind behavior together, including acceleration and deceleration. The supplied notes do not include tension setpoints or a recorded PID tuning sequence.
Both passes use a rising temperature profile. The objective is solvent removal before lamination; subsequent adhesive curing is a separate part of the process.
Controlled initial evaporation
Continued solvent removal
Further drying
The supplied process notes emphasize avoiding rapid surface drying at the dryer entrance, which can leave solvent within the adhesive layer. The foil layer makes reliance on solvent escape after lamination inappropriate.
Air is directed onto the coated web. Temperature, airflow, exhaust, coating weight and line speed must be evaluated together. The temperature ranges here are case-reported values; the measurement location has not been specified.
The case notes identify fine white spots and small bubbles that may remain after curing. Their timing and distribution help guide investigation.
Check the temperature progression, exhaust and actual drying conditions. Relate the defect to coating weight and speed, and use residual-solvent testing to establish whether drying is adequate.
Review coating uniformity, dry coat weight, wetting and lamination-nip conditions. Insufficient adhesive coverage or trapped air may leave visible voids.
For polyurethane systems with an isocyanate-containing curing agent, investigate moisture in materials, solvent and handling conditions. Moisture-related reactions can generate CO₂; confirm the adhesive system before attributing bubbles to this mechanism.
Compare printed and unprinted areas. Uneven ink coverage, coating laydown or inadequate leveling can contribute to white spots; check adhesive and ink compatibility as part of the review.
Appearance alone does not prove leakage or reduced barrier performance. Laminate bonding, foil integrity and finished-pouch sealing need separate checks.
The supplied trial sequence increases line speed in 50 m/min steps. Good laminate quality was reported at the final 250 m/min stage.
Good laminate quality at 250 m/min.
This is the operator-reported observation supplied for the case. Trial duration, per-pass speed records and laboratory results have not been provided.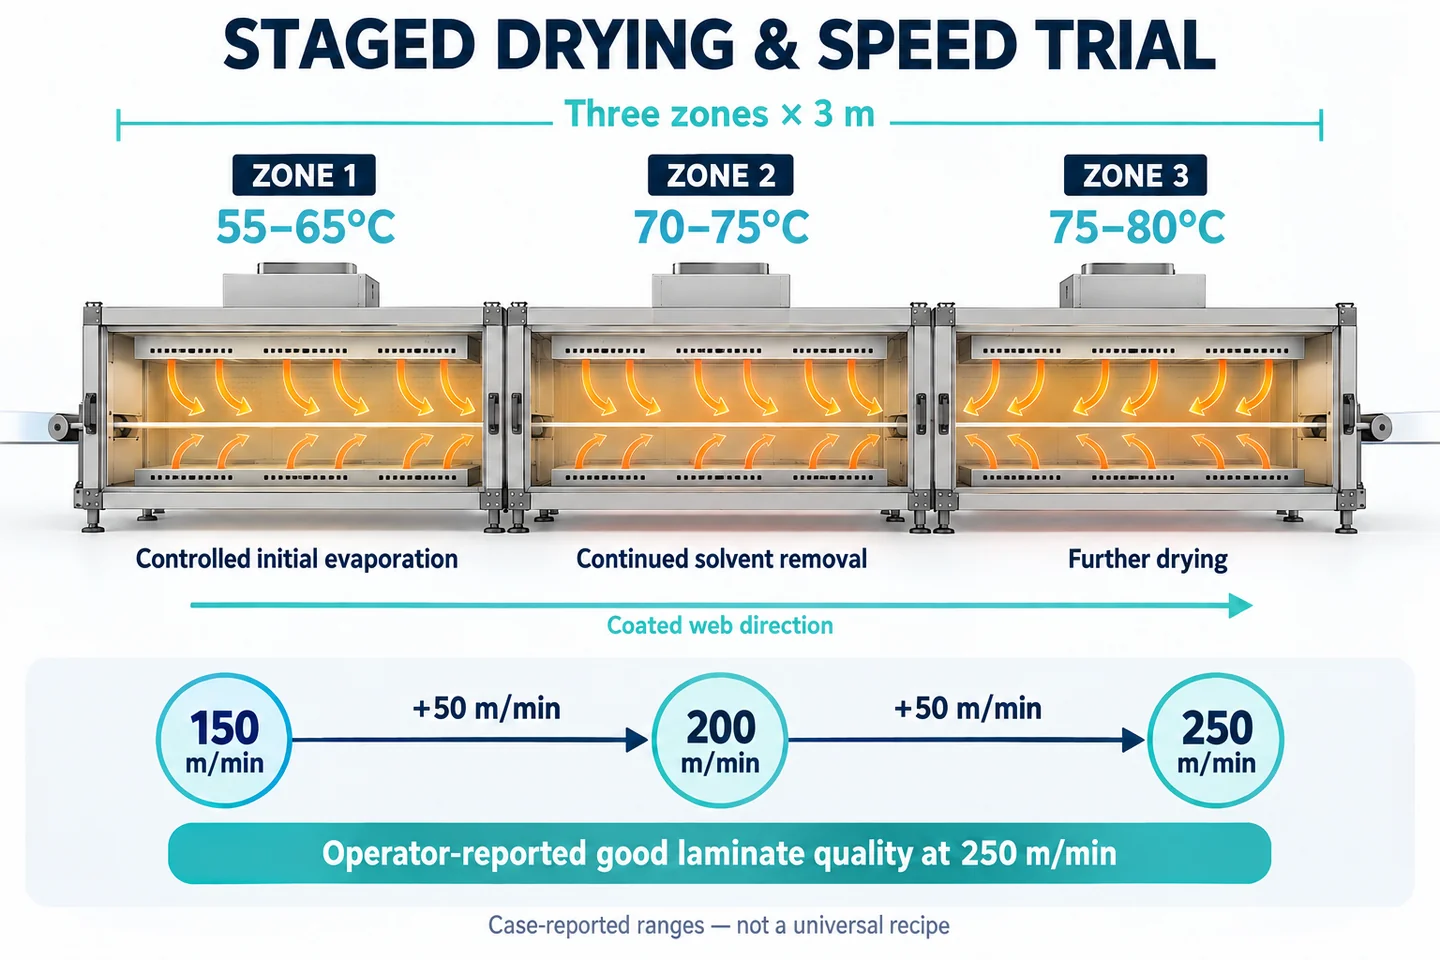
For a complete production assessment, record actual conditions and check the laminate after the specified curing cycle.
Share your films, foil thickness, packaging use and target output. We can discuss the equipment and the process information needed for an informed review.
Prepared from supplied process notes. Packaging and dryer visuals are explanatory illustrations; they are not customer-site photographs.